|
|
Page modifiée à 05:38, 11 Avr 2012 par MichelBuffa
A multi-participant Paint in HTML5De $1Table des matières
IntroductionIn this tutorial, you will learn how to write a multi-participant Paint program in pure HTML5, using the <canvas> element, WebSockets, the getUserMedia API pour live video capture, the NodeJS server, etc. Recommended tools
Download lab exercicesAll the source files you will need are included in this archive (4Mo). Unzip, go in the "Paint_HTML5_Multi_Tutorial". You will find subdirectories step1, step2, etc... corresponding to each step described in this document. Step 1 : a very simple paint !Go into the step 2 directory. You may try the example by opening paint.html in your browser. Notice the first lines of this file : <!DOCTYPE HTML>
<!-- Note : in HTML5 the DOCTYPE can be memorized by a normal human being -->
<!-- Common mistake : if we put a comment before the doctype element, Internet Explorer will not
consider the document as a HTML5 document and the canvas tag for example,
will not be displayed ! -->
The DOCTYPE is the brand new ultra-simple HTML5 DOCTYPE, yeah ! Notice that if you write ANYTHING before this DOCTYPE line, IE9 will not consider the file as HTML5, and you will no be able to run the example ! The <canvas> tag in the page will be ignored. Other browsers will however do nothing nasty if you write some comment at the top of the document. Then, we declare a CSS and some JavaScript scripts. Yep, we will use jQuery for most DOM manipulation and event handling. HTML5 proposes the new document.querySelector(...) that behaves closely like jQuery selectors but is so much longer than $(...), and jQuery uses querySelector internally... <link rel="stylesheet" href="css/paint.css"/> <script src="js/jquery-1.7.2.min.js"></script> <script src="js/utils.js"></script> <script src="js/paint.js"></script> paint.js holds most of the code for a small "draw when mouse moves" paint program, while utils.js contains a utility function for getting correct mouse cursor position. When the document if fully loaded and the DOM ready, we create a Paint object, that will hold most of our JavaScript code. <script type="text/javascript">
// Run when the DOM is ready
$(document).ready(function () {
// Create the pseudo object which will handle the main canvas
paint = new PaintObject("canvasMain");
});
</script>
The parameter ("canvasMain") is the Id of the <canvas> tag you will find in the HTML part of the page : <canvas id="canvasMain">
<p>Canvas tag not supported by your browser</p>
</canvas>
Let' have a look at the PaintObject code in the paint.js file... First we get a reference on the canvas element and secondly we get a context object in order to draw in the canvas : function PaintObject(canvas) {
// get handle of the main canvas, as a DOM object, not as a jQuery Object.
var mainCanvas = $("#"+canvas).get(0);
var mainContext = mainCanvas.getContext('2d');
...
We also bind a mouse move listener to the canvas : // Bind event on the canvas
$("#canvasMain").mousemove(this.mouseMoveListener);
The mouse listener is a method of the PaintObject that draw a line at each mouse move, from the previous mouse position to the current one : // Mouse motion listener for drawing lines
this.mouseMoveListener = function (event) {
// we delegate the computation of the mouse position
// to a utility function (in utils.js) as this is not so trivial
// we must take into account insets, etc.
var mousePos = getMousePos(mainCanvas, event);
// Let's draw some lines that follow the mouse pos
if (!started) {
previousMousePos = mousePos;
started = true;
} else {
mainContext.beginPath();
mainContext.moveTo(previousMousePos.x, previousMousePos.y);
mainContext.lineTo(mousePos.x, mousePos.y);
mainContext.closePath();
// draws as wireframe the drawing orders between beginPath() and closePath()
mainContext.stroke();
previousMousePos = mousePos;
}
};
Notice that in order to draw a line we declare a path, we move to a position, we draw a line to another position, we close the path. The path is drawn at the mainContext.stroke() call. It will be drawn with the current mainContext.strokeStyle value, which is defaulted to Black. Be careful : just forget to close the path and at every mouse move you will draw the whole path from the beginning ! Indeed : mainContext.stroke() draws every draw primitive declared since the context.beginPath() call... if a beginPath() is called while a path is not closed, it is ... ignored. Notice the trick we use in order to set the size of the canvas depending on the size of the browser. Instead of using CSS percentages on canvas width and height, that produce ugly scaling of canvas content, we adjust the size from a JavaScript piece of code : // Canvas doesnt scale well with '%' in CSS so we use a little trick.
// We give them the size of one of their parent node which can be scalable.
mainCanvas.height = $("#content")[0].clientHeight;
mainCanvas.width = $("#content")[0].clientWidth;
Step 2 : manage mouseUp, mouseMove, mouseDown, define a pencil drawing objectGo into the step 2 directory. You may try the example by opening paint.html in your browser. This time we draw only when the mouse moves while a mouse button is pressed ! We also separated the code that draws from the initialisation of the PaintObject. the file drawingtools.js will hold "drawing objects" like pencil, line, rectangle, circle and so on... while paint.js will just do the job for creating contexts, binding events, etc. We used jQuery to bind different mouse events to the canvas (paint.js) // Create the drawing tool
var drawingTool = new pencilDrawingTool();
// Bind events on the canvas
$("#canvasMain").mousedown(drawingTool.mouseDownListener);
$("#canvasMain").mousemove(drawingTool.mouseMoveListener);
$("#canvasMain").mouseup(drawingTool.mouseUpListener);
and here is the drawingtool.js content with only a tool that draws like a pencil (notice the 3 listener methods for mouseDown, mouseMove and mouseUp events) : // Previous position of the mouse
var previousMousePos;
// Drawing tool object
function pencilDrawingTool() {
this.mouseDownListener = function (event) {
paint.started = true;
previousMousePos = getMousePos(paint.getFrontCanvas(), event);
};
this.mouseMoveListener = function (event) {
// we delegate the computation of the mouse position
// to a utility function as this is not so trivial
var mousePos = getMousePos(paint.getMainCanvas(), event);
// Let's draw some lines that follow the mouse pos
if (paint.started) {
paint.getMainContext().beginPath();
paint.getMainContext().moveTo(previousMousePos.x, previousMousePos.y);
paint.getMainContext().lineTo(mousePos.x, mousePos.y);
paint.getMainContext().closePath();
paint.getMainContext().stroke();
}
previousMousePos = mousePos;
};
this.mouseUpListener = function (event) {
paint.started = false;
}
};
Step 3 : add a second, transparent canvas on top of the main canvas, for drawing elastic linesGo into the step 3 directory. You may try the example by opening paint.html in your browser. This example shows an interesting use of canvases : they can be layered one on top of another. Using relative position and z-index with different values, they can act as layers in photoshop. By default they are transparent, and if you use the context.clearRect(x, y, width, height) function you will make a transparent rectangle and be able to "see through" it. We will use this feature to draw an elastic line (lines that follow the mouse position) on a transparent front canvas, without modifying the main canvas. In order to animate the line when the mouse moves, we clear the front canvas before drawing a line in its new position. Adding a new canvas on top of the previous one This is done in paint.js : // Prepare a second canvas on top of the previous one, kind of second "layer"
var frontCanvas = document.createElement('canvas');
frontCanvas.id = 'canvasFront';
// Add the temporary canvas as a second child of the mainCanvas parent.
mainCanvas.parentNode.appendChild(frontCanvas);
// Get the context for drawing in the canvas
var frontContext = frontCanvas.getContext('2d');
this.getFrontCanvas = function () {
return frontCanvas;
}
this.getFrontContext = function () {
return frontContext;
}
We added a line drawing tool in drawingtools.js We declared an array that will hold the different drawing tools (pencil, line, etc) : var DEFAULT_TOOL = 'pencil'; ... // Create the drawing tool var drawingTool = new setOfDrawingTools[DEFAULT_TOOL](); And the event binding has been modified in order to call the current drawing tool mouse listener method : // bind events. We use a function multiplexEvent that will call the proper listeners
// methods of the currentTool.
this.bindMultiplexEvents = function () {
$("#canvasFront").mousedown(this.multiplexEvents);
$("#canvasFront").mousemove(this.multiplexEvents);
$("#canvasFront").mouseup(this.multiplexEvents);
}
// if currentTool is pencil, and event.type is mousemove, will
// call pencil.mousemouve(event), if currentTool is line and
// event.type is mouseup, will call line.mouseup(event) etc.
this.multiplexEvents = function (event) {
drawingTool[event.type](event);
}
...notice that in the line drawing tool (drawingtools.js) we draw only in the front canvas, and before we clear the front canvas : // the Line Drawing Tool Object
setOfDrawingTools.line = function () {
this.mousedown = function (event) {
paint.started = true;
previousMousePos = getMousePos(paint.getFrontCanvas(), event);
};
this.mousemove = function (event) {
var mousePos = getMousePos(paint.getFrontCanvas(), event);
if (paint.started) {
// Clear front canvas before drawing the elastic line in a new position
paint.getFrontContext().clearRect(0, 0, paint.getFrontCanvas().width,
paint.getFrontCanvas().height);
paint.getFrontContext().beginPath();
paint.getFrontContext().moveTo(previousMousePos.x, previousMousePos.y);
paint.getFrontContext().lineTo(mousePos.x, mousePos.y);
paint.getFrontContext().stroke();
paint.getFrontContext().closePath();
}
};
this.mouseup = function (event) {
paint.started = false;
}
};
In the paint.html file, we added some spans in order to select the current tool (l <div id="drawCommands">
<h6>Pick a tool</h6>
<span id="line">line</span>
<span id="pencil">pencil</span>
</div>
And in paint.js we detect clicks on them : // Handle the drawing tools menu. The selected entry value can be 'Pencil',
// 'Line' etc.
this.changeDrawingTool = function () {
// this.id is the id of the selected menu item
drawingTool = new setOfDrawingTools[this.id]();
}
// Bind the changeDrawingTool function onClick to every menu items.
$("#drawCommands").find("span").click(this.changeDrawingTool);
Small problem : how can we make the line stay on the drawing when we release the mouse button ? Step 4 : draw the front canvas on the main canvas on mouse release when drawing linesGo into the step 4 directory. You may try the example by opening paint.html in your browser. This time when we release the mouse button the line is drawn and will stay in the main drawing, even if we draw other elastic lines. We just draw the front canvas on the the main canvas on mouseUp events. In paint.js we added a drawFrontCanvasOnMainCanvas() method on the PaintObject : this.drawFrontCanvasOnMainCanvas = function () {
mainContext.drawImage(frontCanvas, 0, 0);
// after copying the front canvas content, we clear it !
frontContext.clearRect(0, 0, frontCanvas.width, frontCanvas.height);
}
Notice that we use the drawImage() call from a canvas context object. Indeed, we can draw a canvas on a canvas ! And we call this method from the mouseUp() listener method of the line drawing tool : // The Line Drawing Tool Object
setOfDrawingTools.line = function () {
...
this.mouseup = function (event) {
paint.started = false;
paint.drawFrontCanvasOnMainCanvas();
}
};
Step 5 : adding a rectangle and a Circle toolGo into the step 5 directory. You may try the example by opening paint.html in your browser. This time, the same way we did the line tool, we added two new tools : one for drawing elastic rectangles and one for drawing elastic circles. You may look at these tools in drawingtools.js. Now that we have a small framework, you can try to add your own tools for drawing ellipses, images etc. Step 6 : playing with stroke and fill styles, lineWidth, HTML5 new input types (color, range)Go into the step 6 directory. You may try the example by opening paint.html in your browser. This time we added new HTML5 input types in the graphic user interface : <ul>
<li>Fill color:
<!-- if running opera you may try : <input id="fillColor" type="color"
value="FFFFFF"/> instead of this jscolor input field -->
<input id="fillColor" class="color" value="FFFFFF"/>
</li>
<li>Stroke color:
<!-- if running opera you may try :<input id="strokeColor" type="color"
value="FFFFFF"/> -->
<input id="strokeColor" class="color" value="000000"/>
</li>
<li>
<!-- works only in Chrome and Opera, will display a standard input text in Firefox -->
Stroke size: <input id="strokeSize" type="range"
min="0" max="20" value="1" step="0.5"
style="position:relative;top:6px;"/>
</li>
<li>
Fill shapes : <input id="fillShapes" type="checkbox" checked/>
</li>
</ul>
We used a <input type="range".../> for selecting the line width. This will work in Opera, Webkit based browser. It is not yet supported by Firefox, but will work nevertheless if you enter a numeric value. For color selection we used a "polyfill", a <input class="color" /> that works with the jscolor.js library. If you are running Opera, the HTML5 <input type="color"/> will work and display a nice color chooser natively. Just modify the HTML code and open in Opera. In paint.js we handle the values of these fields in order to keep the contexts for both canvases (mainCanvas and frontCanvas) up to date : // Handle the color menus
mainContext.strokeStyle = frontContext.strokeStyle = "#" + $("#strokeColor").val();
$("#strokeColor").change(function() {
mainContext.strokeStyle = frontContext.strokeStyle = "#" + $("#strokeColor").val();
});
mainContext.fillStyle = frontContext.fillStyle = "#" + $("#fillColor").val();
$("#fillColor").change(function() {
mainContext.fillStyle = frontContext.fillStyle = "#" + $("#fillColor").val();
});
// handle the stroke size
mainContext.lineWidth = frontContext.lineWidth = $("#strokeSize").val();
$("#strokeSize").change(function() {
mainContext.lineWidth = frontContext.lineWidth = $("#strokeSize").val();
});
var fillShapes = true;
// handle the check box that specifies if we fill shapes
//this.fillShapes = $("#fillShapes").attr('checked');
$("#fillShapes").change(function(){
fillShapes = $(this).attr("checked");
});
Like that, all the calls to stroke() or fill() using any of the contexts will draw a shape using the selected corresponding color. Step 7 : adding a chat in our application, starting point for a multi-participant experienceWe are going to use HTML5 WebSockets in order to send and receive messages from a small chat application we will embed in our graphic user interface. We will use the NodeJS web server In order to use WebSockets we need a WebSocket server. We propose in this tutorial to use the NodeJS web server. NodeJS is a lightweight server that has the particularity of running server applications written in JavaScript (it embeds the V8 Javascript interpreter, the same that is embedded in the Chrome Browser). Numerous modules are available :
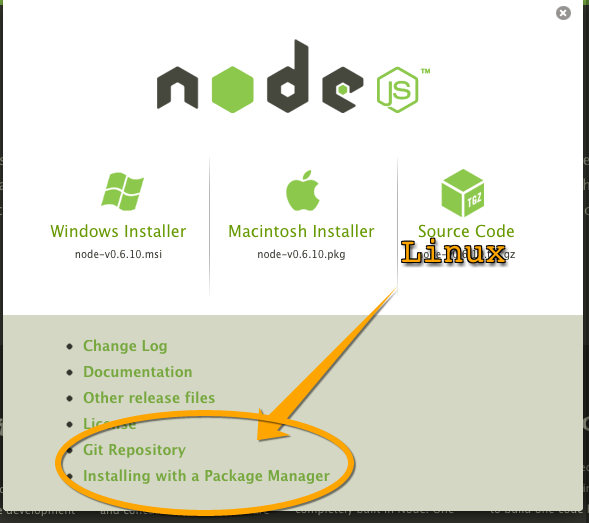
Installing NodeJSGo to http://www.nodejs.org and follow the installation procedure. If you are running Linux, look carefuly at nodeJS home page, there is a link to precompiled builds :
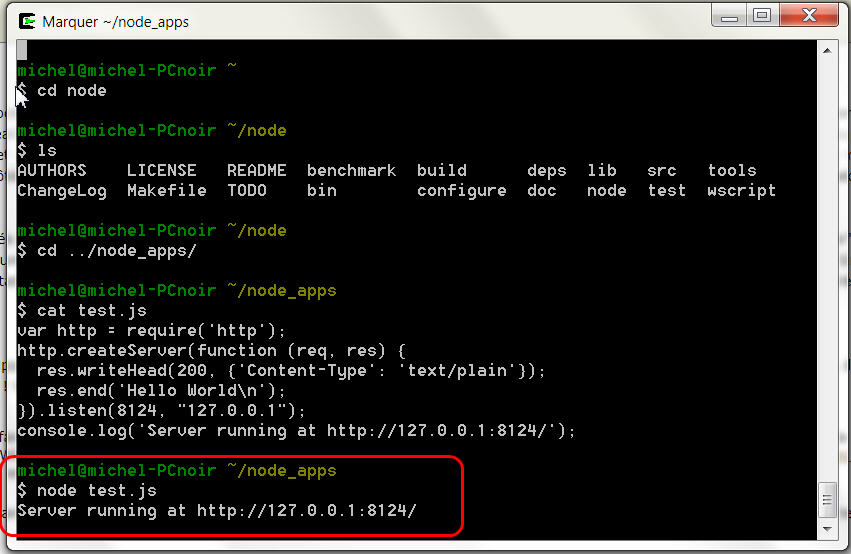
Update your PATH variable so that the node executable is found when you type "node --version" in your favorite terminal/dos command window (note : C:\Program Files(x86)\nodejs by default on windows). Test now NodeJS using a small application
var http = require('http');
http.createServer(function (req, res) {
  res.writeHead(200, {'Content-Type': 'text/plain'});
  res.end('Hello World\n');
}).listen(8124, "127.0.0.1");
console.log('Server running at http://127.0.0.1:8124/');
Save it somewhere. Then run from the command line : node test.js
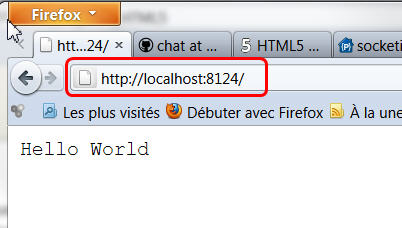
Open it using your web browser ! You should get :
This was our first NodeJS application ;-) Adding node modules for WebSocketsThere are numerous ways to add modules to NodeJS. If you are using Linux, it is pretty straightforward, normally it should go fine if you have a Mac, and if you are running Windows it may be a bit more complicated for some modules like NowJS that require VC++ redistribuable to be installed. Most of the time we install modules using the npm command (Node Package Manager). And most of the time we run this command in the directory of our projet. This will create a node_modules subdir in the project. The chat application we will run now comes in this archive : ChatNowJs.zip Note that the archive contains already a node_module directory, but it will not suffice as the installation of modules may also compile native parts of some modules. Unzip the archive somewhere, go in the ChatNowJS directory and run the following commands :
Run the simple chat applicationRun the following command : "node simpleChat_server.js", then open http://localhost:8080 in your browser. Open two tabs at the same URL, you will see an input field. Type in something, and it should be sent to the other tab (as both are clients connected to the same WebSocket server). In case you have no errors when you launch"node simpleChat_server.js", and the chat is not working, open the JavaScript debugger console. If you get a "now.distributeMessage no such object/function", then your browser is "too old but not so much", it supports WebSockets, but not the "good ones" ! Indeed some Firefox version from one year/one year and a half had an implementation for an older versions of the protocol. Update or change your browser. If it still does not work even with a recent browser (problem only encountered under windows and exotic antivirus/anti spywares), you may tell socket.io (used by nowJS) not to use HTML5 WebSockets but another mean of transmission instead: modify one line in the simpleChat_server.js code :
Study the simple chat applicationTwo files are involved in the simple chat application :
Open these files in your favorite editor : the application is ...wow, just a few lines of code... Let's talk about nowJS.... now ! NowJS defines a "magic pocket" called "now" : a JavaScript variable you can manipulate from client code running in your browser, that will hold variables and functions shared between the client and the server code. The server code can use a "everyone.now" variable in order to define variables and functions shared with all clients. For example, in the server side, defining a function Server : everyone.now.distributeMessage = function(message){
everyone.now.receiveMessage(this.now.name, message);
};
Example of call by a client (see the simpleChat.html file) : $("#send-button").click(function(){
now.distributeMessage($("#text-input").val());
$("#text-input").val("");
});
So one clic on the send button executes Client : now.receiveMessage = function(name, message){
$("#messages").append("<br>" + name + ": " + message);
}
And this function, located on the client side, will just append to the chat log the message that just arrived ! The same way, a variable defined in the client code, now.name = prompt("What's your name?", "");
May be used in the server code as a kind of "session" variable, using the Server : everyone.now.distributeMessage = function(message){
everyone.now.receiveMessage(this.now.name, message);
};
Using this simple paradigm, NowJS enables rapid development of collaborative logic over WebSockets. Notice that objects are send as is, as pure javascript objects, they are serialized/deserialized in JSON under the hood. Adding the Chat application to our Paint ProgramGo into the step 7 directory. Stop nodeJS if it is still running. Look at the server.js file : // Use the express module for nodeJS
// Express is a framework for implementing a more
// complete web server with nodeJS
var express = require('express');
var app = express.createServer();
// Indicate where static files are located
app.configure(function () {
app.use(express.static(__dirname + '/client/'));
});
app.get('/', function (req, res) {
//res.render('client/paint.html');
res.redirect("/paint.html");
});
app.listen(80);
// Creation of a web socket server using nowJS
var nowjs = require("now");
var everyone = nowjs.initialize(app);
nowjs.on("connect", function () {
console.log("Joined: " + this.user.clientId);
});
nowjs.on("disconnect", function () {
console.log("Left: " + this.user.clientId);
});
// Function called by a chat client, passes the message to each client
// connected by calling its processIncomingChatMessage shared function
everyone.now.distributeMessage = function (message) {
// send the message to everyone
everyone.now.processIncomingChatMessage(this.now.name, message);
};
This server code is very similar to the one of the chat program, instead this time we use the "express" NodeJS module to run the HTTP web server part (13 first lines). This enables to serve properly HTML pages that include CSS or JavaScript files. The rest is very similar to the simpleChat_server.js file. Run the following command : "node server.js", and open "http://localhost" in your browser. This time you should see the same paint program we had in step6, augmented by a chat application at the bottom of the user interface. Open two tabs with the same URL, try to chat... Both the paint and the chat should work at the same time. Paint actions are not transferred however... we will add that in the next step ! You may look at the source code as well. We isolated the JavaScript code for the chat in a chat.js file while we added the input field and a div for handling log messages in the paint.html file. Here are the additions in the paint.html file : <head>
...
<!-- NowJS is a High level lib built on top of socket.io.
Uses WebSockets if available. The page needs to
be served by the NodeJS server -->
<script src="js/chat.js"></script>
<script src="/nowjs/now.js"></script>
<script type="text/javascript">
// Run when the DOM is ready
$(document).ready(function () {
// Create the pseudo object which will handle the main canvas
paint = new PaintObject("canvasMain");
// Bind events to the canvas
paint.bindMultiplexEvents();
// Init the chat system
now.ready(function () {
// We must be sure "now" exists. So we prompt the user only
// when the shared variable "now" is ready !
// prompts a dialog and asks for a nickname
now.name = prompt("What's your name?", "");
//Create the pseudo object which will handle the chat
chat = new ChatObject();
});
});
</script>
</head>
Notice that the paint.html file includes a now/now.js file that is served by NodeJS and that is not part of the paint project. It is located in the node_modules/now directory. This is why we had to install/configure the different modules for NodeJS. We also create the chat object only when the nowJS is fully initialized. NowJS calls the now.ready() method once it is ready, so we create the chat object in the body of this method. At the end of the paint.html file we added the HTML necessary for the chat : <div id="chat">
<div id="chatMessages"></div>
<input type="text" id="chatTextInput">
<button class="menuButton" type="button" id="chatSendButton">Send</button>
</div>
The code for handling a press on the send button (or the enter key in the input field), sending the message, and displaying received messages is in the chat.js file : var chat;
function ChatObject() {
// Handle message input for the chat
// When the send button has been clicked... or when the enter key has been
// pressed -> send content to the chat
// server
$("#chatTextInput").keypress(function (e) {
var code = (e.keyCode ? e.keyCode : e.which);
if (code == 13) {
sendChatMessage();
}
});
$("#chatSendButton").click(function () {
sendChatMessage();
});
function sendChatMessage() {
if ($("#chatTextInput").val() != "") {
// This function is defined on the JavaScript code that runs on the server
now.distributeMessage($("#chatTextInput").val());
$("#chatTextInput").val("");
}
}
// This function is called when a chat message arrives. Called by the server !
now.processIncomingChatMessage = function (username, message) {
// appends the incoming message to the messageLogs
$("#chatMessages").append("<p><strong>" + username + "</strong> : " +
message + "</p>");
$("#chatMessages").get(0).scrollTop = $("#chatMessages").get(0).scrollHeight;
}
};
|
Powered by MindTouch Deki Open Source Edition v.8.08 |